
Looking to send additional communications to retailers beyond campaign invitations and reminders? Check out the messages tab on the left-hand sidebar. These messages can be used to send retailer surveys, notify retailers of important platform updates, send newsletters, product or campaign information, as well as targeting pending and eligible retailers.
To get started, select Messages from the left-hand navigation menu.
Customize:
Adding Buttons
When adding a Button to an email in the Promoboxx platform, select the </> button to toggle HTML view. Then copy and paste the following code:
<center> <b><font style="font-family: Helvetica;"><a href="ENTER DESIRED URL" target="_blank" style="background:rgb(0, 127, 190);border-radius:2px;color: rgb(255, 255, 255);display: inline-block;line-height: 20px;margin:3px 0px;padding:10px 17px 11px;text-decoration: none !important;"><font size="3">BUTTON TEXT</font></a> </font></b></center></div>
Replace ENTER DESIRED URL with the webpage you want the button to open. Replace BUTTON TEXT with the text you want displayed. When adding a button, use clear, action-oriented text so retailers immediately understand what they should do next.
How to Change the Color of a Button:
To change the color of your button, simply edit the hex color code for the button in HTML. The hex code appears right after the link where it says "background:rgb(0, 127, 190);"
To find the hex code for the color you'd like, you can go to https://color.adobe.com/create/image/ upload your brands logo, and it will provide the hex color codes for you so you can copy and past them into your button code.
Adding Gifs & Images
Tip: Instead of taking screenshots, you can create a GIF video!
- We recommend using images that are within 500px-1000px to ensure images download in retailers' mailboxes. Typically 600x600px are best for email images.
- Download the GIPHY CAPTURE app from the Mac App Store
- Record a section of the retailer dashboard that will be used in the message (For example, National Recommended Content)
- Set the start and end date of the GIF so it’s less than 15 seconds long
- Change the dimensions/sizing as needed so that the GIF is as close to 1MB as possible
- Upload the GIF in image hosting section of the message or campaign
- To find this section in the global message, just click the image icon and then click “manage images” and upload the GIF on that page.
- After you upload, go back to the message and click on the image icon again and select the GIF
- Make sure the width of the gif is no larger than 600px
- Tip: Upload your images before drafting the message. Opening Manage Images takes you to a separate page, so uploading them first can help prevent you from losing unsaved work.
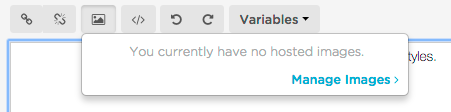
How to make images clickable
- Upload the image in "image hosting." This can be for both global messages and campaign messages.
- Next, go to your email and switch it to HTML mode. Copy the following code: <a href="../html-link.htm"><img src="example.jpg"></a>
- Replace the "/html-link.htm" with the URL destination you want the image to link to.
- Then, replace "example.jpg" with the URL of the image from image hosting.
Add a Campaign Link
To find a campaign link:
- Select Edit next to the campaign.
- Scroll to the Communications section in the left-hand menu.
- Select Invitations.
- Copy the campaign link displayed at the top of the page and add it to your message.
Reporting:
Looking to see how your message performed? Click on the "edit" button to the right of your message, and select "view reporting".
The reporting section of messages provides an overview of the results of the communication you sent, specifically showing how many messages were delivered, opened, clicked, bounced, invalid, and spam reported.
Comments
0 comments
Please sign in to leave a comment.